Showing posts with label LA potter. Show all posts

Friday, July 23, 2021

Almost There!

Y'all are probably wondering if I'm incapable of making anything but Supernatural drinking vessels, anymore, since that's all I seem to be posting, lately. The answer is, of course, yes! But there are a multitude of these to finish before my Sunday morning kiln-loading deadline.

Because "Assbutt" is classier in this font, that's why!
Throwing. A little drying. Trimming. A little drying. Pulling the handle. Attaching the handle. A little more drying so the handle can firm up properly. Carving the design and text. 

Then on to underglazing, sometimes with one color on the interior of the mug (three coats) and another on the outside (three coats) and then matching the inlay color with the interior when painting in the carved part of the design (three coats). And then they get to dry the rest of the way until they're what potters call "bone dry." Pretty important for them to be as dry as they can be before firing, otherwise they'll "explode" in the kiln as soon as the temperature hits 212°, the boiling point of water. The steam coming out of a damp piece will cause that area or areas to "explode."

Those are just the initial stages they need to go through before the first (bisque) firing. After that 24-hour firing cycle (slow up, hold target temperature, then slow cooling), they come out get all the dust blown off or washed off and are allowed to dry completely before the clear glaze is applied, either by brushing (again, the magical three coats) or by dipping.

It's time-consuming, of course. And it's honestly satisfying for me to know I'm making for a fandom which will appreciate all the time and effort. It's satisfying to know that no one else is dumb enough to put all this blood, sweat, and tears into a cup.

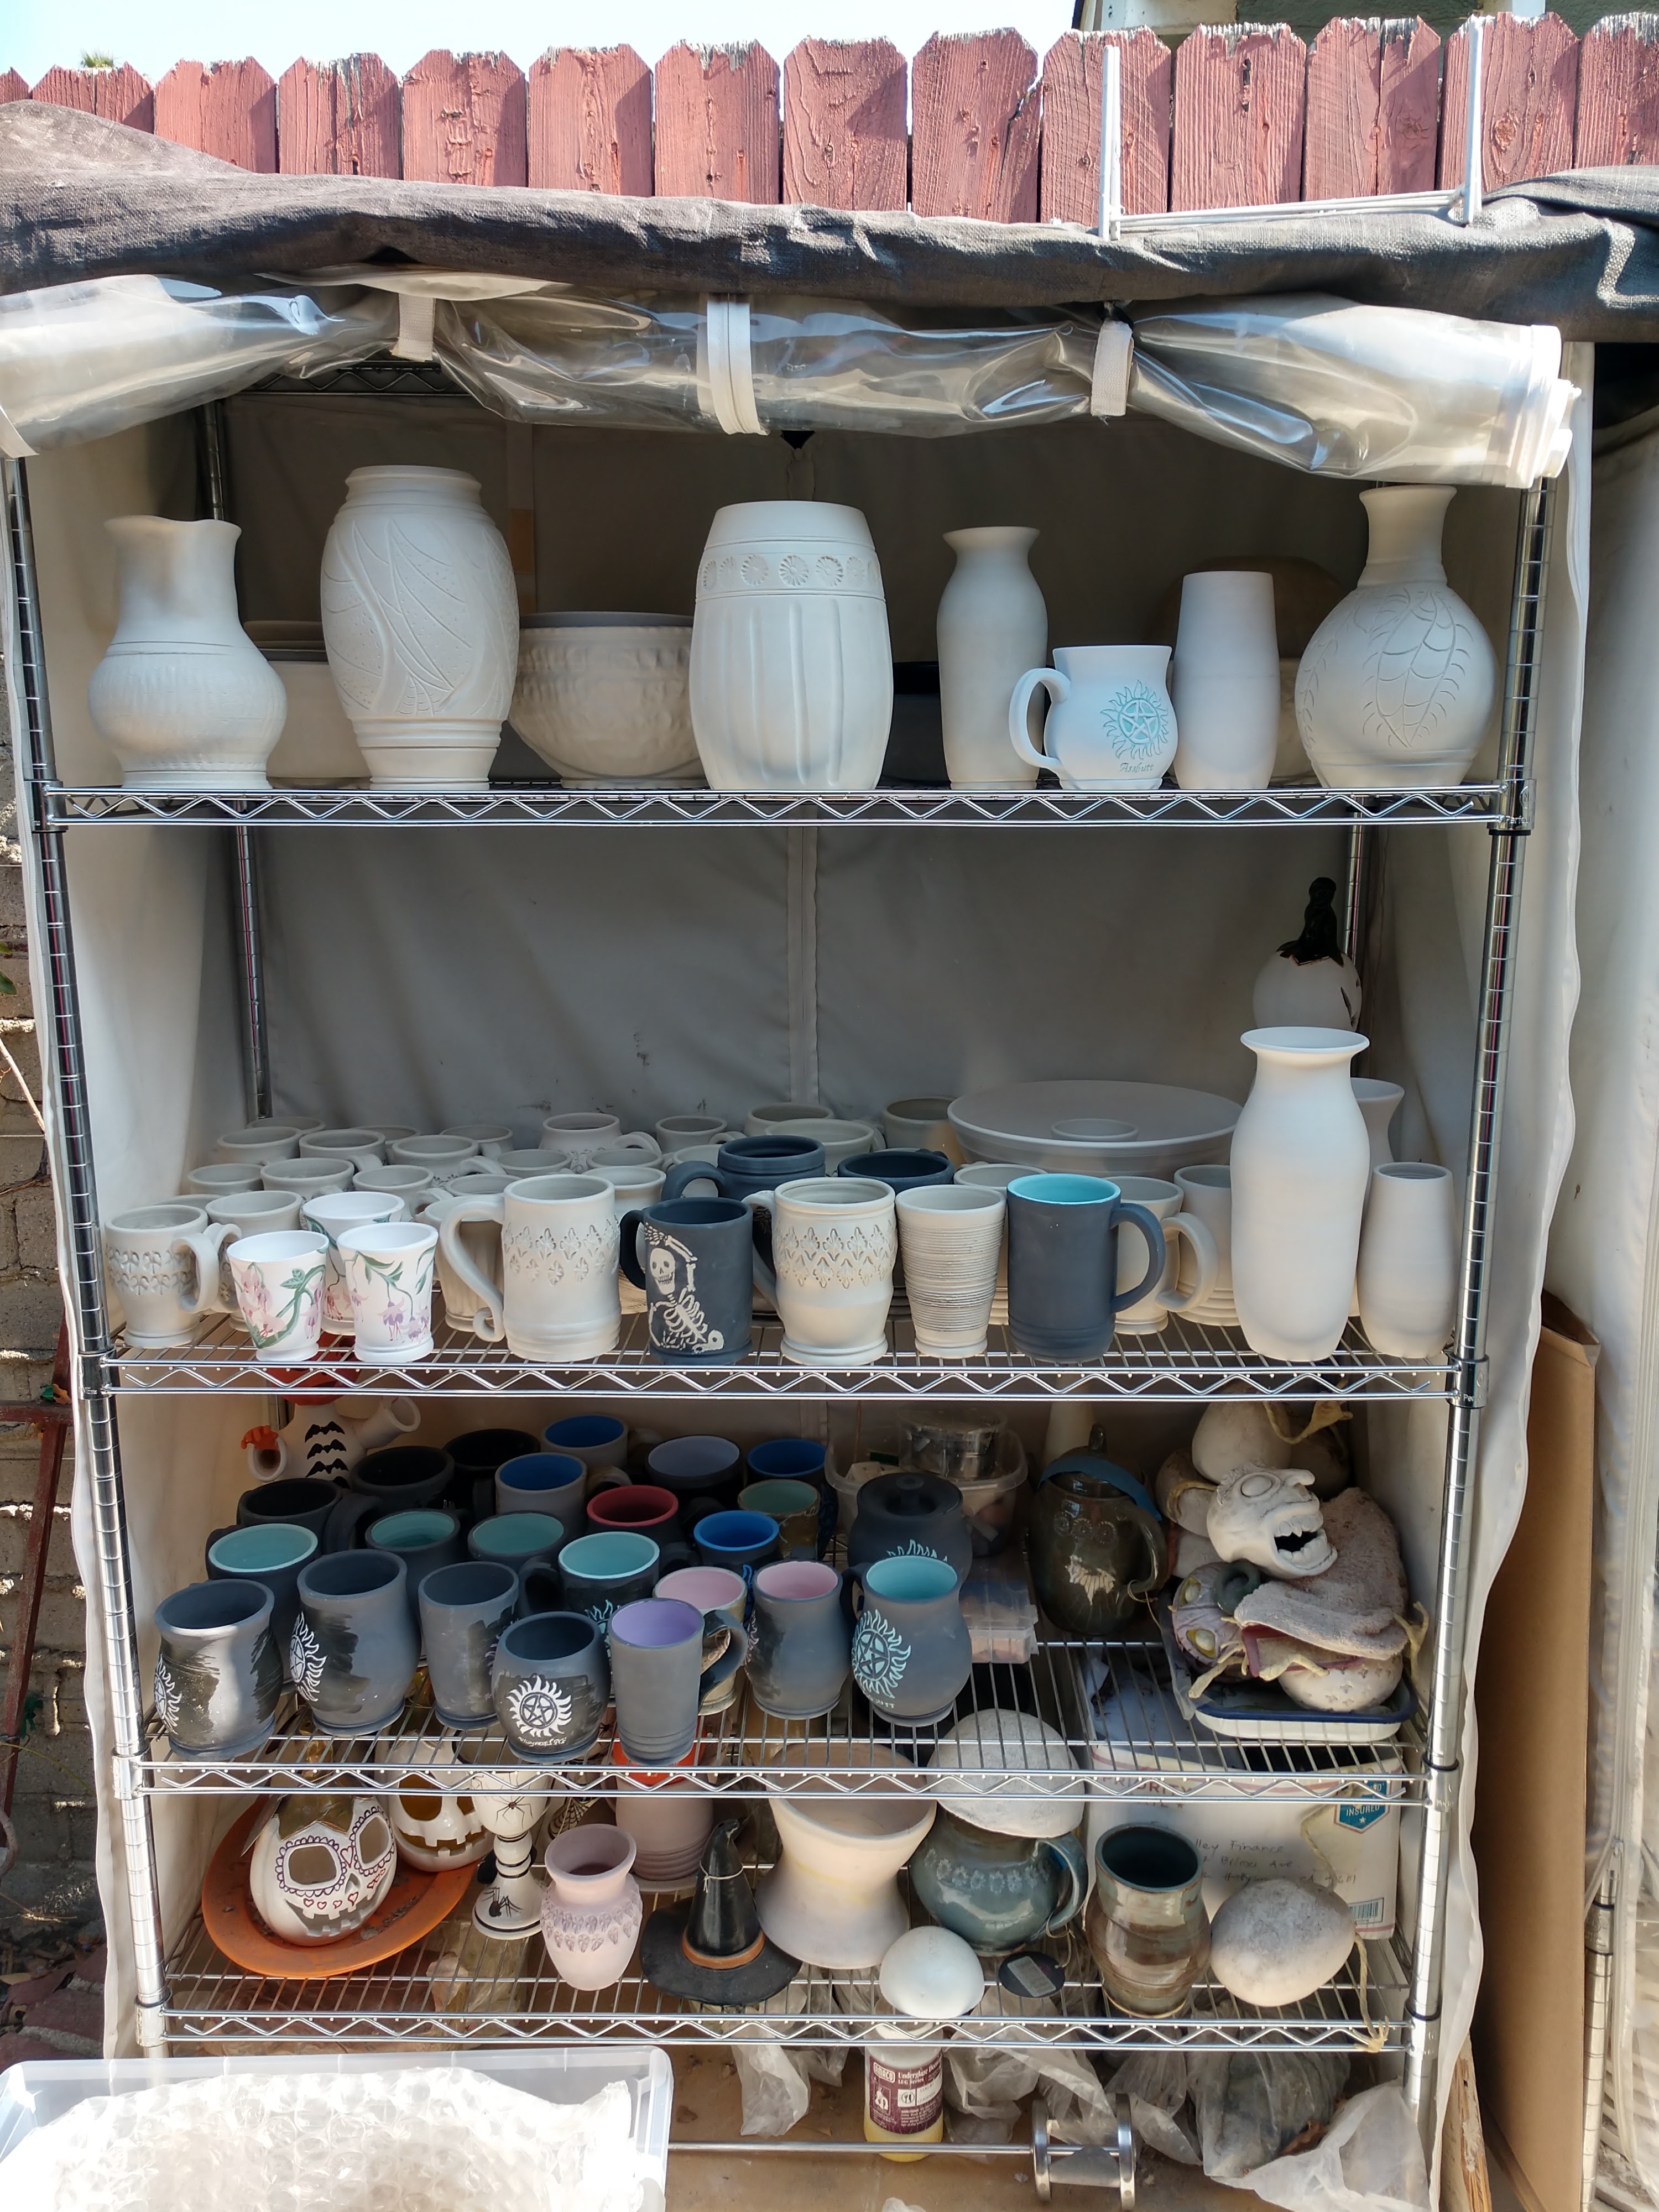
I've commented before in these pages that I'm passionate about everyday things being beautiful as well as functional. When you use them, they should, to quote Marie Kondo, "spark joy." For me, there's more joy in a handmade item than in something generic, made by a corporation for practical purposes, only. Yes, there are mass-market mugs with pithy sayings on them, and yes, they have their place, certainly! Even I have a few. (Somewhere in storage, I still have a mug from Klagenfurt, Austria, which I visited with my grandmother way back when. It always reminds me of her!)
 
But even so, I prefer the handmade.

Months of work, waiting to get packed!

Next is the very complex and nervous work of packing all these babies into bins to take to the ceramics place.


Nervous because they're at a point where knocking them the wrong way will cause an irreparable break, like the one below.

There's just no method I've been able to find which will reliably repair bone-dry clay and keep it together through all the processes so it can be a durable, functional piece. 

So into the trash this one went! Normally I'd throw it into my slop bucket and reconstitute it, but I had already underglazed it, and I can't mix the underglaze with the clay.

The good news is, there's still plenty to go to the studio!

But back to "complex and nervous."
 
Loading the bins is complex because packing unfired ceramics is actually a game of Tetris. If you have large bowls to pack, everything around them must be far enough away to not chip or break the rims, even when the intervening space is occupied by bubble wrap. If you have underglazed clay pieces, they should be put it with other items the same color so there's no cross-contamination with other colors or unglazed ware.

I use smaller bins because unfired ware is heavy and I can better manage them on my own, both for this purpose and for shows.

I started packing last Sunday, because the process always takes me longer than I think it will, and I really hate stressing myself out at the last minute! There's nothing like having a deadline and realizing, too late, that you need another bin or two and there's no time left to go buy them!

Well, alright, kids! I have another layer of underglaze to put on before I start inlaying, so that's all for now!

Wish me luck! 

Thursday, March 25, 2021

New Works in Progress

Starting sgraffito work on a bowl

In my glorious, newly cleaned, outdoor studio, I've been puttering along at a relatively leisurely pace, in part due to the fluctuating temperatures, in part due to a shoulder injury gotten during Ninja Training.

OK, that last part may have been a stretch. But I've got an injury which, for once, will not be requiring surgery, and I've been instructed by my physical therapist not to do anything to make it angry. Fortunately, it's on my right side, and hasn't inhibited my throwing, but schlepping 25-pound bags of clay to the table so I can wedge it can be a bit of a pain. Oh, to be a famous potter and have a studio assistant!

But such is life! I keep plugging along, anyway.

There are a couple of techniques I've wanted to either try for the first time, or to continue to develop.

Sgraffito is one of them. I've done it before, but I plan to expand the technique to include color inlay, too. I'm pretty excited about it, to be honest, because it has the potential to shift my art into a direction which has more depth on the surfaces of my ceramics.

I'm having fun using the "regular" sgraffito technique, too. I think once my skeleton creations come out of the final firing, the color of the clay will give the bones an antique look.


Another technique I'm playing with is that of burnishing.

Burnishing this here pot with a little water and a smooth stone. 

I'm practicing this technique for a couple of reasons. First, I've always wanted to try my own pit firing. Burnishing the pot first makes it look as if it was glazed, first, even though it isn't. Second, I've been putting off making my beloved Sam's urn, in part because it's an emotional thing, in part because I haven't decided what shape would be best. I think he deserves to be in a nicer resting place than a cardboard box, no matter how pretty it looks. I'm leaning towards a round, lidded piece, but thrown all in a single form. Later, when the clay hardens enough, the lid gets cut out.

I've continued stamping, too!

I made the vase, above, without much thought of decoration. But then it started telling me it wanted a few daisies and some fluting! Who am I to say no? I'll probably make some more of these along the same lines.

I made this bowl, also with the intention of leaving plain, but then the stamping bug grabbed me again and I had to test out this stamp I made!

I debated doing some inlay on it, but decided against it. I'm looking forward to seeing a glaze on it which breaks nicely in the indentations.

Lastly, I've been playing with watercolor and copic markers, again, just for practice, plus I continue to make jewelry on afternoons when it's too cold to work on my pottery.

Sorry about the cruddy picture quality, but you get the idea!

Stay tuned for more artistic adventures!

Sunday, June 28, 2020

A Little Color

I added a little color to the carved parts of the new sugar skull jack-o'-lanterns I made. The next step was to wait for everything to dry and scrape off any of the overflow so the lines could look crisp. Afterwards, I touched up the spots where the white underglaze was too thin or missing, and now these guys are drying with the rest of the jacks I've made so far.

I'm really looking forward to the studio opening so I can get everything fired, but man! I am nervous about getting them all there without breaking anything! Dry clay is so fragile, and can beak or crumble far too easily, making transport a nervous endeavor. The pumpkin people, in particular, are going to make me sweat, because their little fingers are at the biggest risk for breakage.

Crossing my fingers! 

Thursday, June 4, 2020

A Couple Of Jacks...

For me, these little guys lend a little sense of normalcy, a little sense of rhythm of the year. I was always making new critters for my shows this time of year, and even though I can't fire them right now, it's comforting to have my hands in clay and to be able to make things which I know will make others happy.
It's humbling to know that some folks will bring these guys out yearly, like they do their Christmas decorations, and like Christmas decorations, be delighted when they come out of their box.
 And maybe, just maybe, the kids will grow up with fond memories of these faces. The faces they grew up with. The faces they associate with Hallowe'en, laughter, costumes and candy.
Knowing I made someone's Halloween memorable, makes me happy. I think that we need all the "happy" we can get, these days, don't you?
Fresh on the wheel. Shaping, trimming and carving, still to go!
I'm really grateful I had the time to develop these skills. That I had teachers who nurtured my talent. No one is truly a self-made person. Someone always invests in you, first, and brings you along. I am so very lucky I've had that in my life!

Monday, January 14, 2019

Oh, the Glamor!

One of the most basic parts of being a potter is the tools you use to make your pottery. Some of the tools are expensive but easy to make yourself, in the sense that they're not complicated.

Plaster bats are on this list. Get yourself a five-gallon plastic bucket from your local hardware store, some potter's plaster from your ceramics supply store (it only costs a few bucks!), some plastic plant dishes from your local garden store and some water, and you're in business! 
Plaster bats are one of the potter's go-to tools. They enable us to throw certain kinds of forms, such as plates, without running the risk of warping or destroying the form when we take it off the wheel head.
We fasten the plaster bat, which is like a thick disc of plaster, to the wheel head with a bit of wet, sloppy clay. The plaster absorbs the water and helps it to stick and stay put. Then we can throw low, wide forms such as plates on the bat without having to cut it from the wheel head because the plaster will absorb the moisture from the clay evenly and the plate will just pop off evenly, without warping, when it's ready.
Making bats is messy and time-consuming, and frankly, I hate doing it! But I couldn't justify packing my bats and driving them down from Folsom to LA when they're heavy and very likely to break along the way. I gave them away to a nearby school so they could replace some of their old ones which had gotten chipped.
After rubbing the plaster through my hands into a bucket in order to get rid of the lumps, I started mixing the plaster by hand, paying special attention to getting it smooth.
When it was ready, I poured it into my plastic dishes and left it to set.
 After I poured them, a little jiggle here and there helped get some of the air bubbles out. 
Immediate cleanup is key. I had a bunch of old newspapers handy to wipe out the bucket because if you throw plaster down the sink, it will set and wreck your plumbing! I poured the leftover plaster into some newspaper and let it set before throwing it out.

I'm really glad I finally decided to bite the bullet and get it done. Now I can get some more variety in my work!