
I've been busy gathering the last of the parts and supplies I would need for firing up my Raku kiln  on this past Saturday.

First, we had to assemble the kiln for the first time. Some of my friends from past ceramics classes came over to help and watch. My friend, Gary, had already made two other portable Raku kilns, so I was very happy to have his help.

 You start out with kiln wool and landscaping cloth. I had made some "buttons" to put some high temperature wire through, to hold the wool to the wire of the landscaping cloth.
 We then whipped out my new Raku burner, which Mr. ShellHawk commented would be handy for a zombie invasion, as long as the propane tank held out.
 We put down some backer board, then started arranging the fire bricks I'd gotten. Eventually, we'll be putting down a cement pad, because the heat from the firing split the backer board and made it unusable.
 We got the kiln loaded with the ware I'd already bisque fired and then glazed. We set the burner in its place down at the bottom of the kiln where I'd cut the access hole for it.
 We fired it up. To the left, you can see the cold kiln with the burner just turned on. To the right, you can see the ware heating up towards where the glaze starts to flux (or liquefy).

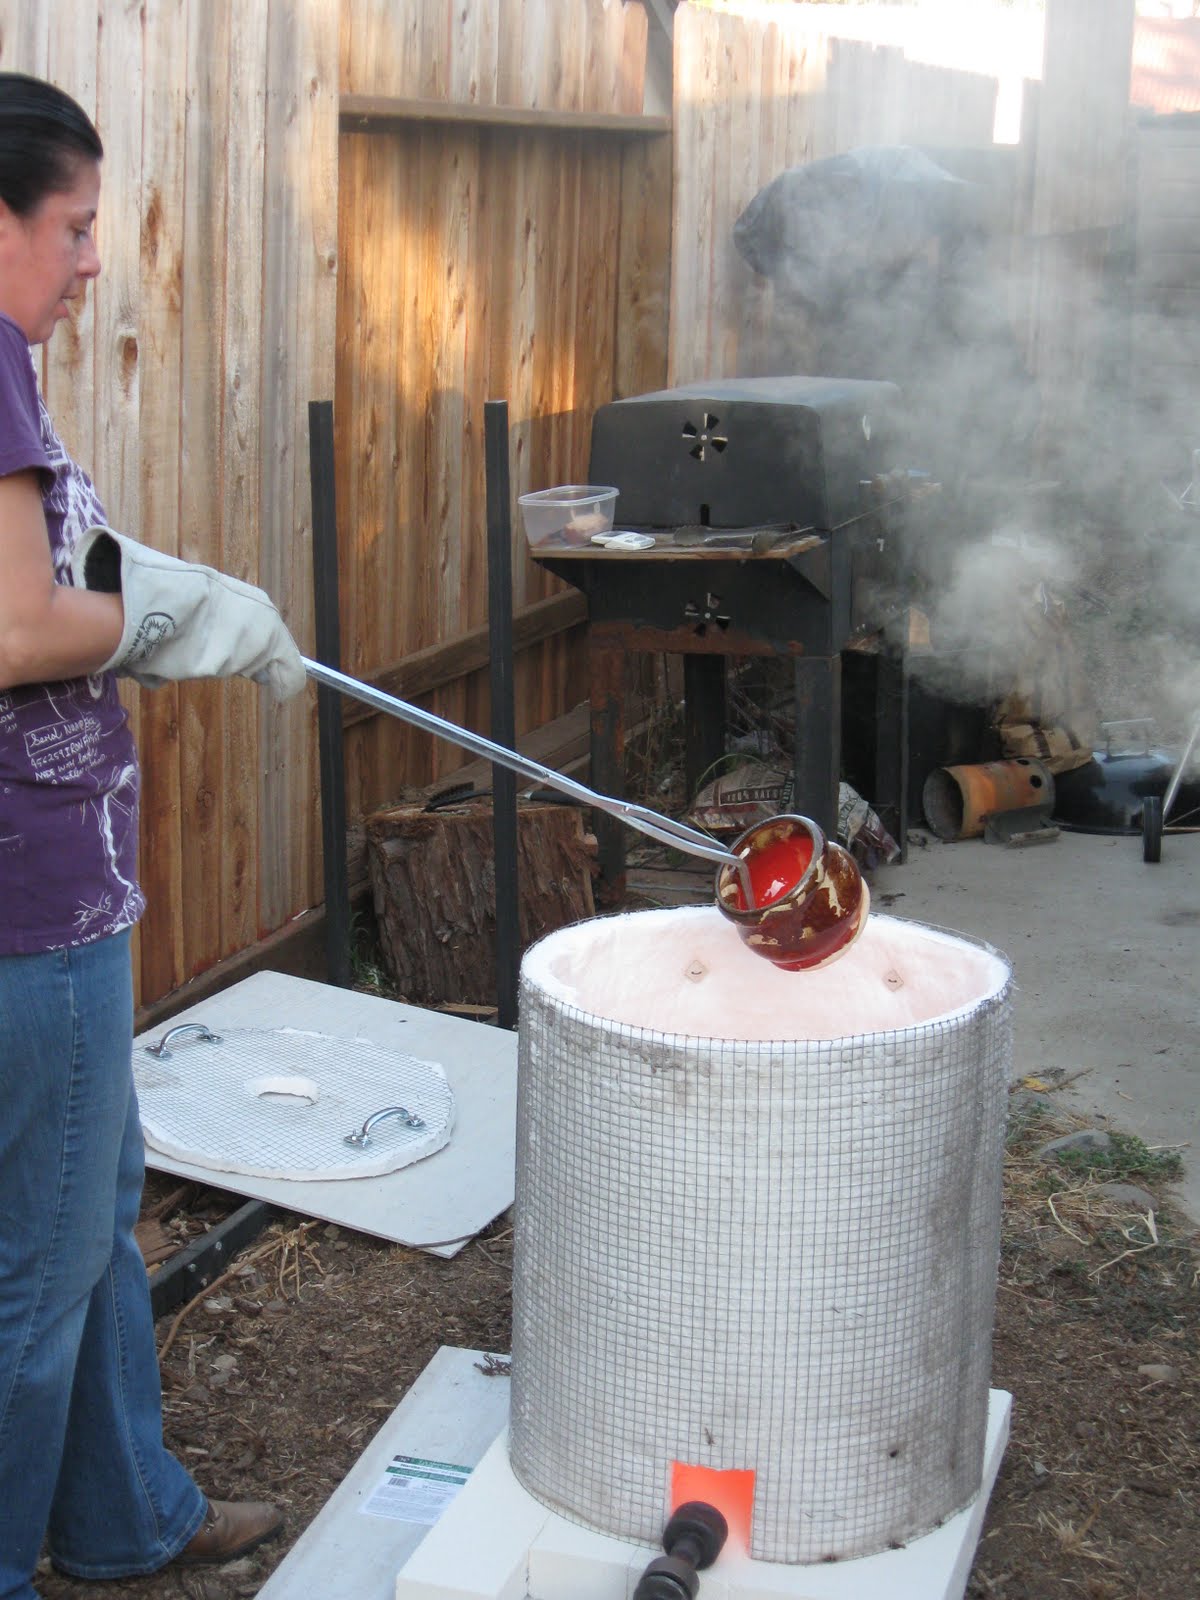
 Once the glaze hits that point, the top of the kiln comes off and I pull out the ware with a set of tongs. I consider it a win that I came out of the firing with both my eyebrows and my arm hair. The temp in the kiln reaches around 1800 degrees, and it simply has to be turned off before I can even get close.
With the help of my friends, I put the glowing ware in a metal trash can filled with organic material-in this case, hay. The ware sets the hay on fire instantly. One person piles more hay on top and the other slams the lid down afterwards. You can actually hear the fire sucking all the oxygen out of the can.

 Later, I pull it out to cool. There's another shot of me pulling ware out of the second firing.
Here are some pics of the finished ware in my new photo tent . I plan to iron out the wrinkles in the backdrop, but otherwise, it seems to work fine. As for the ware, I'm a little disappointed with the uniformity of the glaze; I had hoped for more color and variation. I think I can adjust that if I add some larger pieces of organic material.


Now, out to the studio to make more of these guys!

This one is now in the shop!


Absolutely stunning! I wish I was there looks like so much fun. Your pieces look amazing and I think they do a great job of showing the heart in your work.
ReplyDeleteLooking forward to seeing them on the Etsy store soon :)
Cheers!
That was pretty cool to read and see. Thanks for the post!
ReplyDeleteReally cool.
ReplyDeleteThe process is so wonderfully dramatic. Thanks for sharing a play by play :)
ReplyDeletewow! that was really interesting and I really like how they came out
ReplyDelete